Veggie Sliders with Pesto Spread
Highlighted under: Simple Favorites
When I think of a satisfying meal that’s both healthy and delicious, veggie sliders with pesto spread come to mind. I love how these sliders combine fresh vegetables with a creamy, zesty pesto that elevates the flavors. They’re perfect for a casual dinner, a gathering with friends, or even game day snacks. Plus, they offer a great alternative to classic sliders without sacrificing taste or texture!
Creating these veggie sliders with pesto spread was an exciting challenge for me. I wanted to blend flavors that not only taste great together but also complement the freshness of the vegetables. The key is to roast the vegetables until they're slightly caramelized, enhancing their natural sweetness and bringing out their unique flavors. This technique, coupled with a homemade pesto, turns a simple slider into a gourmet experience.
During my trials, I found that using a mix of different vegetables adds texture and variety, making each bite interesting. I even experimented with making my own pesto using nuts and herbs, which added a personal touch. I encourage you to do the same; it truly makes a difference!
Why You'll Love These Sliders
- Bursting with fresh veggie flavors and a creamy pesto
- Healthy alternative that satisfies meat lovers too
- Perfect for meal prep and easy to customize with your favorite toppings
Perfecting Your Slider Mixture
The combination of chickpeas, grated zucchini, and carrots creates a moist and flavorful base for your veggie sliders. Chickpeas are not only a great source of protein, but they also help bind the mixture, ensuring the patties hold together while cooking. When mashing the chickpeas, leave some chunks for added texture; this gives the sliders a heartier feel. If you find the mixture too wet, consider adding a bit more breadcrumbs to help achieve the right firmness.
Garlic and onion powders contribute to the overall flavor profile of the sliders. If you want to kick up the taste, consider incorporating fresh garlic or finely chopped onions. Just remember that fresh ingredients can add moisture, so adjust the breading accordingly. A good rule of thumb is to check the consistency: the mixture should hold its shape when formed into patties, but not crumble apart.
Cooking Techniques and Tips
When it’s time to cook your sliders, a non-stick skillet or cast-iron pan works best for achieving that golden brown crust. Preheat your skillet over medium heat for about 3-5 minutes before adding the oil; you can test the heat by flicking a few drops of water into the pan—if they sizzle immediately, you’re ready to go. Cook the sliders for approximately 5-7 minutes per side, flipping gently to prevent breaking. Look for a crispy edge as an indicator of readiness.
If your patties are falling apart during cooking, don’t panic! This can often be remedied by ensuring that the mixture is well combined, or by allowing them to chill in the fridge for about 30 minutes before cooking. Chilling helps them firm up, making them easier to handle. Additionally, if you prefer a lighter cooking method, these sliders can be baked at 375°F for about 15-20 minutes, flipping them halfway through for even browning.
Pesto Spread Customizations
The pesto spread in this recipe is incredibly versatile. If you’re looking to lighten it up, consider replacing half the oil with Greek yogurt for a creamier consistency that also adds protein. Alternatively, if you prefer a nut-free option, sunflower seeds or pumpkin seeds are excellent substitutions for the nuts. Blend them similarly in the food processor, and you'll have a delightful spread without the allergy concerns.
Feel free to customize the herbal profile of your pesto as well. While basil is traditional, adding a handful of arugula or spinach can change the flavor while boosting the nutritional content. For a spicy kick, a few fresh chili flakes or jalapeños can be blended right into the pesto. Experimenting with such variations not only keeps the recipe interesting but also allows you to cater the flavors to your personal taste.
Ingredients
For the Sliders
- 1 cup chickpeas, cooked and mashed
- 1 cup grated zucchini, excess moisture squeezed out
- 1/2 cup grated carrots
- 1/2 cup breadcrumbs
- 1 teaspoon garlic powder
- 1 teaspoon onion powder
- Salt and pepper to taste
- Olive oil for cooking
- 4 small slider buns
For the Pesto Spread
- 1 cup fresh basil leaves
- 1/4 cup walnuts or pine nuts
- 1/4 cup grated Parmesan cheese
- 2 cloves garlic
- 1/2 cup olive oil
- Salt and pepper to taste
Instructions
Instructions
Make the Pesto Spread
In a food processor, combine the basil leaves, walnuts, Parmesan cheese, garlic, olive oil, salt, and pepper. Blend until smooth, adjusting the oil for desired consistency. Set aside.
Prepare the Slider Mixture
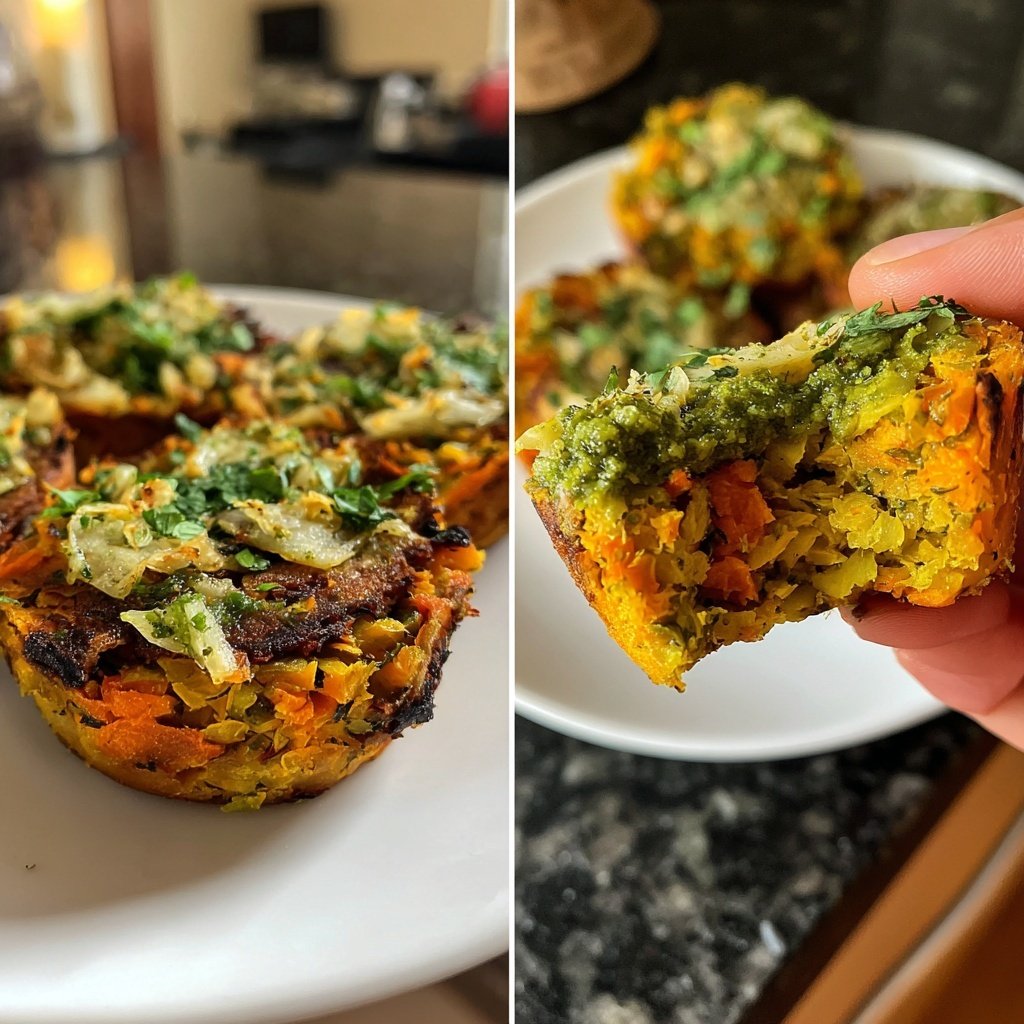
In a bowl, mix the mashed chickpeas, grated zucchini, grated carrots, breadcrumbs, garlic powder, onion powder, salt, and pepper. Form into small patties.
Cook the Sliders
In a skillet, heat olive oil over medium heat. Cook the patties for about 5-7 minutes on each side or until golden brown.
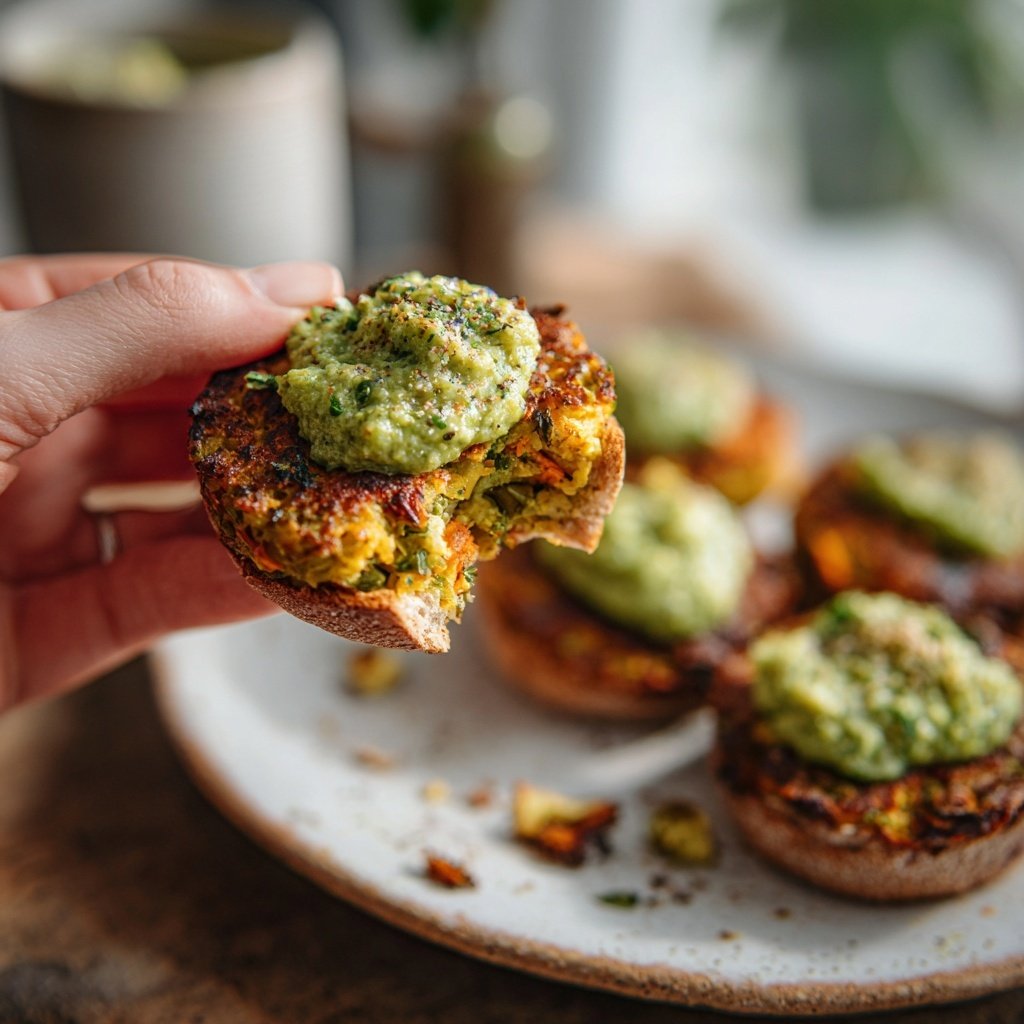
Assemble the Sliders
Place each patty on a slider bun, spread a generous amount of pesto on top, and add any additional toppings you like.
Enjoy!
Pro Tips
- Feel free to customize the sliders by adding your favorite toppings like avocado, lettuce, or tomatoes. You can also make the patties in advance and freeze them for a quick meal later.
Meal Prep and Storage
These veggie sliders are perfect for meal prep and can be stored in the fridge for up to four days. Once cooked, you can keep them in an airtight container to maintain their moisture. If you prepare the slider mixture ahead of time, it can be kept in the fridge for up to 24 hours before cooking, which makes for a quick weeknight meal. You might want to consider making a double batch; cooked sliders freeze well and can be reheated directly from frozen on a skillet over low heat for about 10-15 minutes.
If freezing, it’s best to freeze the patties uncooked. Place parchment paper between each patty when you stack them in a freezer-safe container to prevent sticking. When you're ready to cook them, thaw in the refrigerator overnight for best results and follow the cooking instructions as usual. This way, you can have delicious sliders on hand even on your busiest days.
Serving Ideas and Pairings
Serving these sliders allows for immense creativity. You can offer a variety of toppings ranging from fresh avocado slices to tangy pickles or even caramelized onions for sweetness. A dollop of Greek yogurt or a dollop of spicy aioli can add a unique twist. Consider serving the sliders with a fresh side salad or sweet potato fries to create a complete meal with vibrant colors and textures.
For occasions like game day or casual gatherings, put together a slider bar with different condiments and toppings, letting guests build their own. This not only makes it interactive but also ensures everyone can enjoy them according to their taste preferences. Plus, these sliders work wonderfully when paired with a refreshing drink, such as iced tea or a light lager, making your gathering even more enjoyable.
Questions About Recipes
→ Can I use different vegetables?
Absolutely! You can substitute with your favorite veggies or what you have on hand.
→ How can I make these sliders vegan?
Ensure you use a vegan cheese or skip the cheese in the pesto to keep it entirely plant-based.
→ Can I grill the sliders instead of pan-frying?
Yes, grilling adds a wonderful smoky flavor. Just be sure to oil the grill grates to prevent sticking.
→ How long can I store leftovers?
You can store leftover sliders and pesto in an airtight container in the fridge for up to 3 days.
Veggie Sliders with Pesto Spread
Created by: Maeve Colchester
Recipe Type: Simple Favorites
Skill Level: Easy
Final Quantity: 4 sliders
What You'll Need
For the Sliders
- 1 cup chickpeas, cooked and mashed
- 1 cup grated zucchini, excess moisture squeezed out
- 1/2 cup grated carrots
- 1/2 cup breadcrumbs
- 1 teaspoon garlic powder
- 1 teaspoon onion powder
- Salt and pepper to taste
- Olive oil for cooking
- 4 small slider buns
For the Pesto Spread
- 1 cup fresh basil leaves
- 1/4 cup walnuts or pine nuts
- 1/4 cup grated Parmesan cheese
- 2 cloves garlic
- 1/2 cup olive oil
- Salt and pepper to taste
How-To Steps
In a food processor, combine the basil leaves, walnuts, Parmesan cheese, garlic, olive oil, salt, and pepper. Blend until smooth, adjusting the oil for desired consistency. Set aside.
In a bowl, mix the mashed chickpeas, grated zucchini, grated carrots, breadcrumbs, garlic powder, onion powder, salt, and pepper. Form into small patties.
In a skillet, heat olive oil over medium heat. Cook the patties for about 5-7 minutes on each side or until golden brown.
Place each patty on a slider bun, spread a generous amount of pesto on top, and add any additional toppings you like.
Extra Tips
- Feel free to customize the sliders by adding your favorite toppings like avocado, lettuce, or tomatoes. You can also make the patties in advance and freeze them for a quick meal later.
Nutritional Breakdown (Per Serving)
- Calories: 350 kcal
- Total Fat: 18g
- Saturated Fat: 3g
- Cholesterol: 10mg
- Sodium: 250mg
- Total Carbohydrates: 38g
- Dietary Fiber: 6g
- Sugars: 4g
- Protein: 9g